水体渲染
- 作者:admin
- /
- 时间:2022年12月21日
- /
- 浏览:3375 次
- /
- 分类:厚积薄发
关于水体渲染的一个简单Demo,大部分资源以及实现都来自Unity官方项目BoatAttack以及GPUI插件。本文主要讲解大致实现思路,想详细了解的同学可以下载工程查看(800MB左右)。
工程链接:
https://pan.baidu.com/share/init?surl=RQLLoVQhGAToZoCMvhe9QQ&pwd=mrzz
提取码:mrzz
需要的工具:Unity 2020,VS 2019
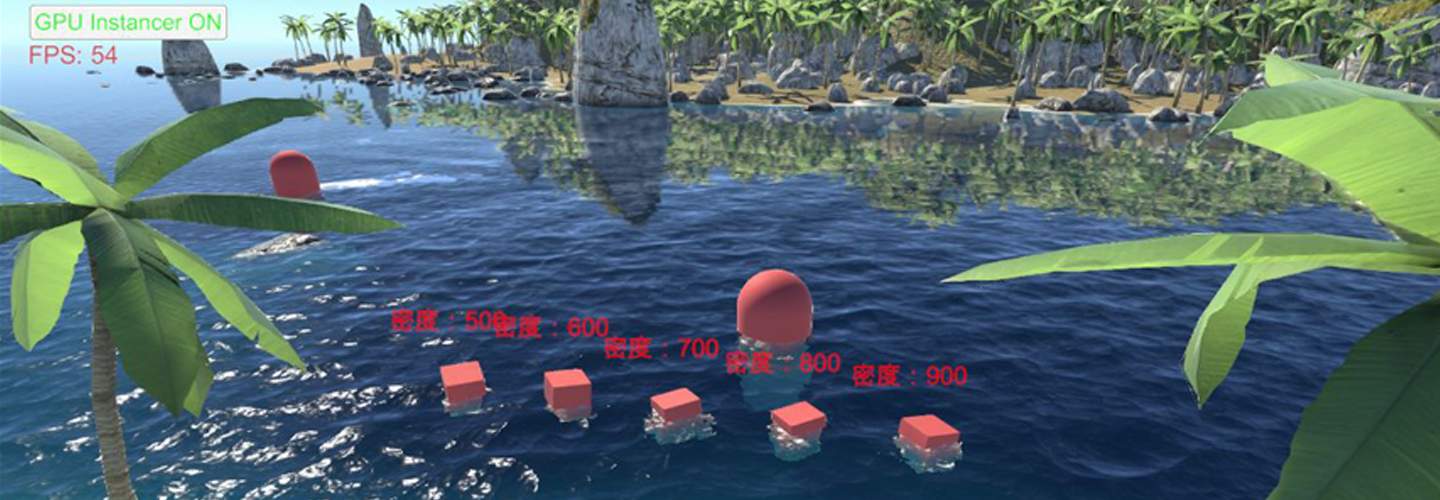
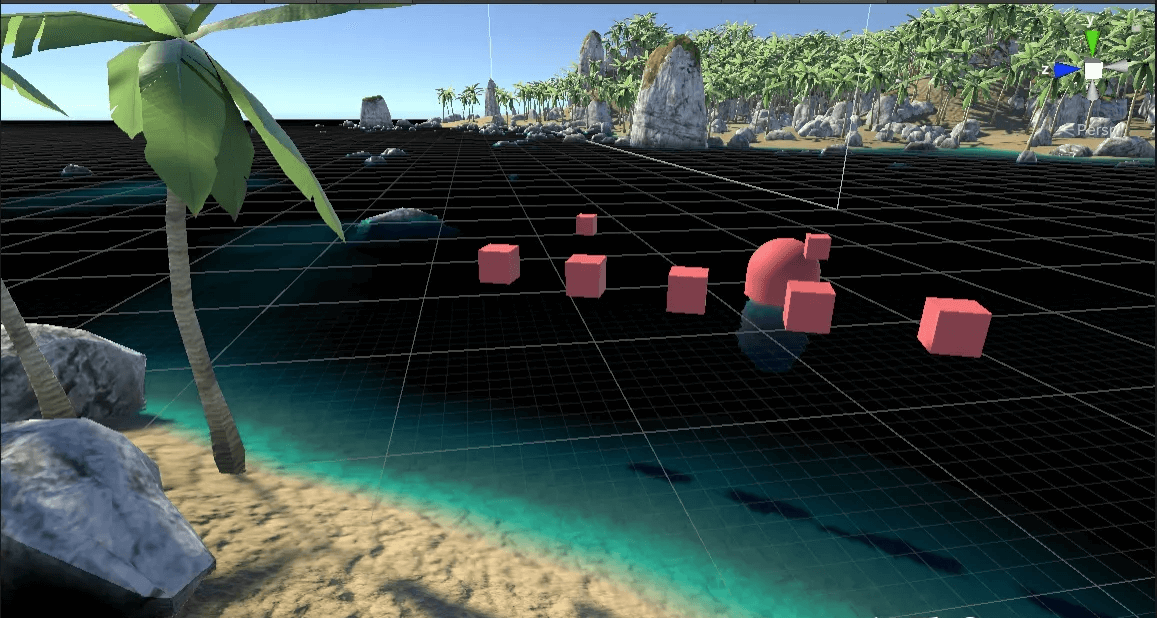
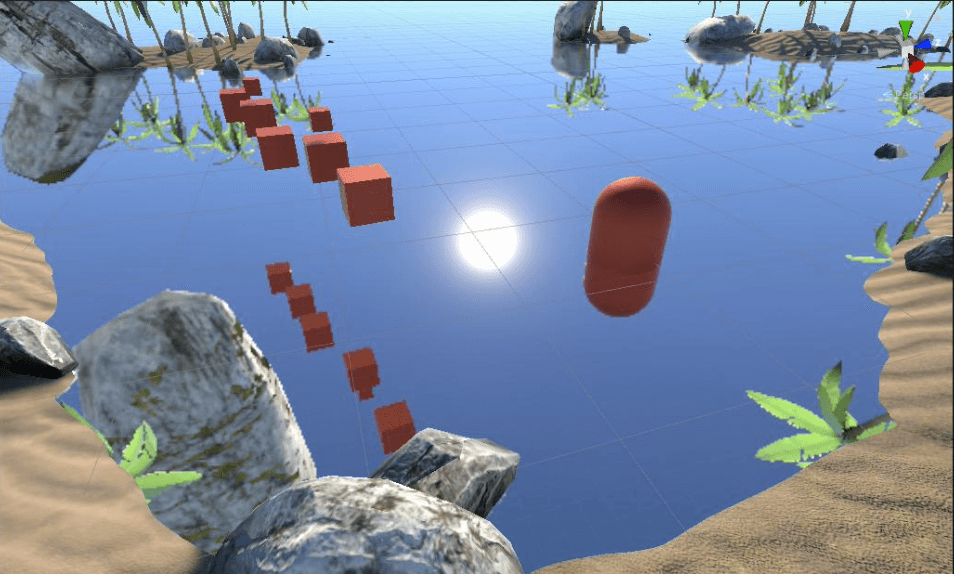
以下水体渲GPU实例化的演示:
水体主要实现的效果:
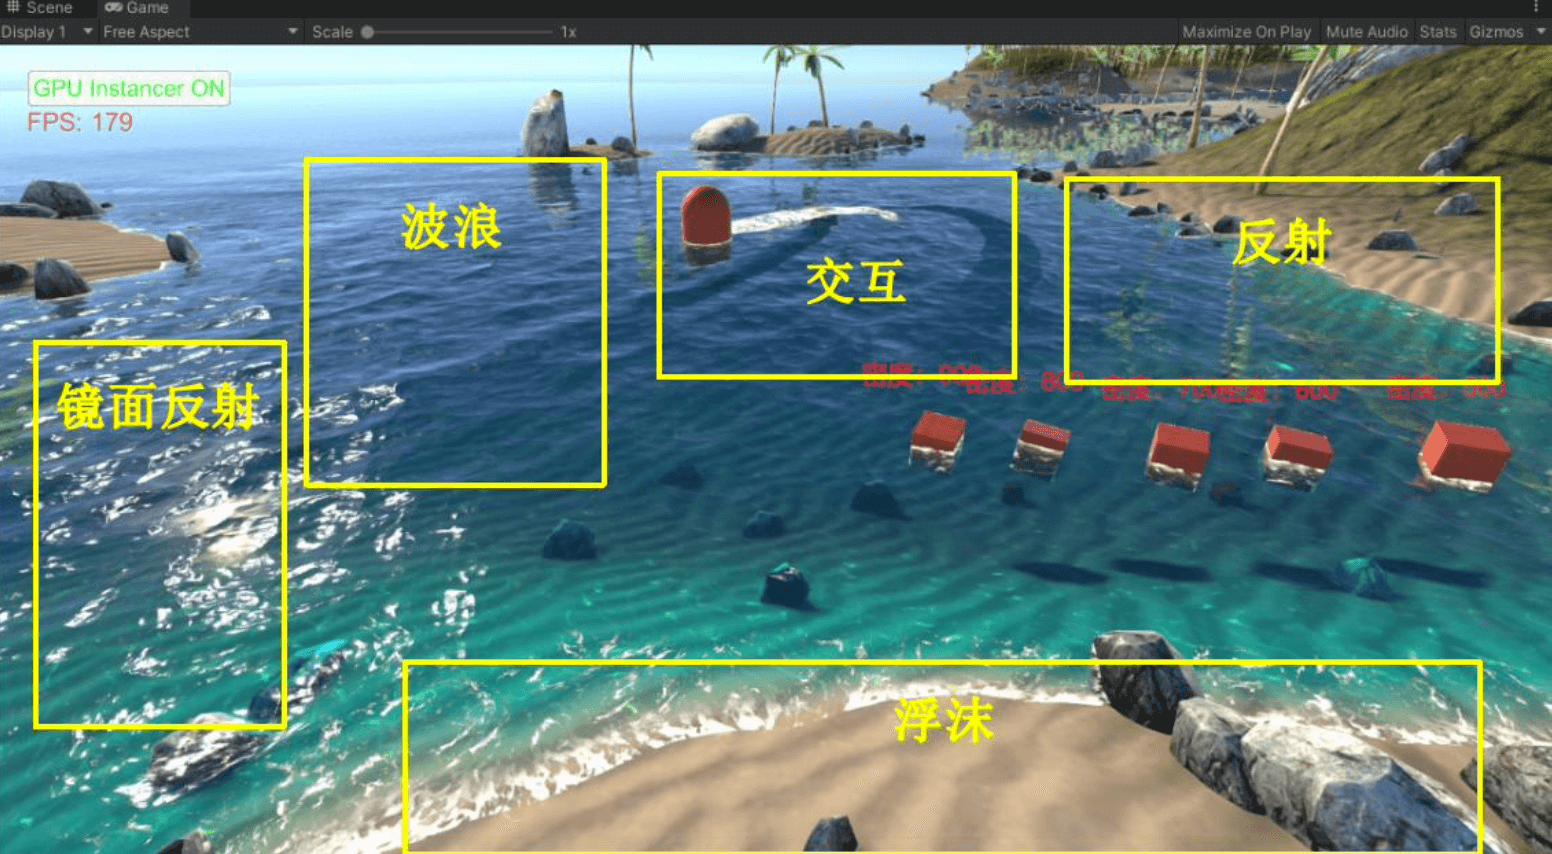
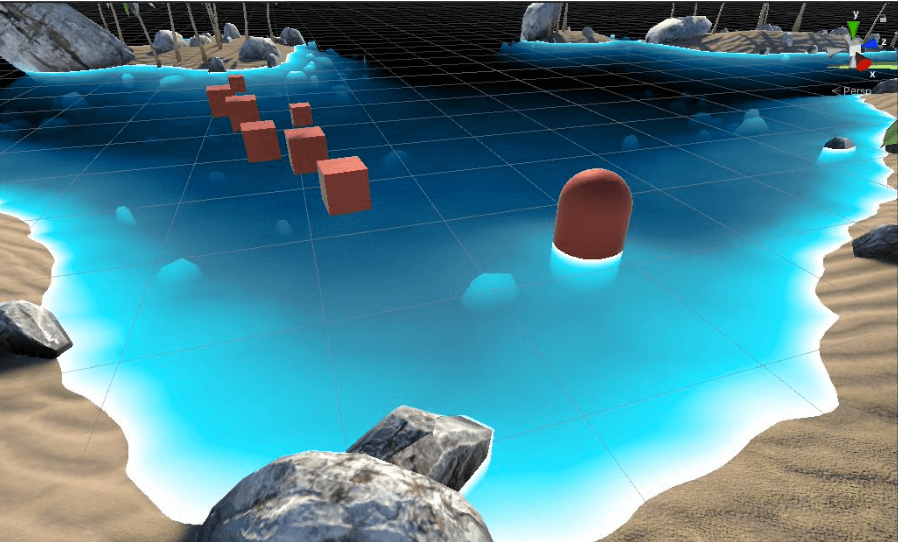
水体渲染效果1
水体渲染效果2
一、波浪
创建一个空物体,挂上脚本ASE_Water.cs。
1. LOD
波浪使用到的资源在Assets\ASE\Meshes\ASE_WaterMesh.fbx。
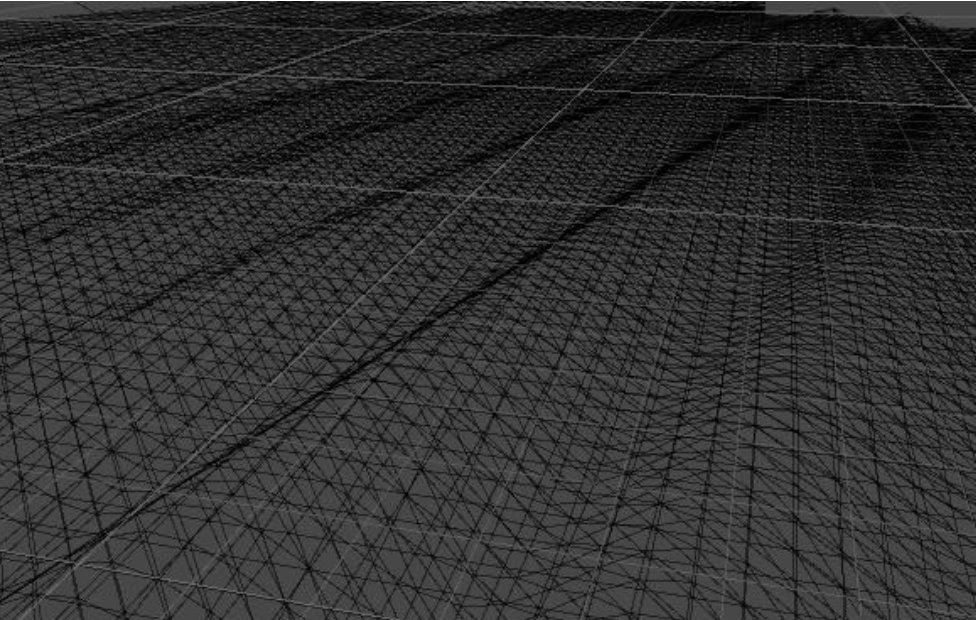
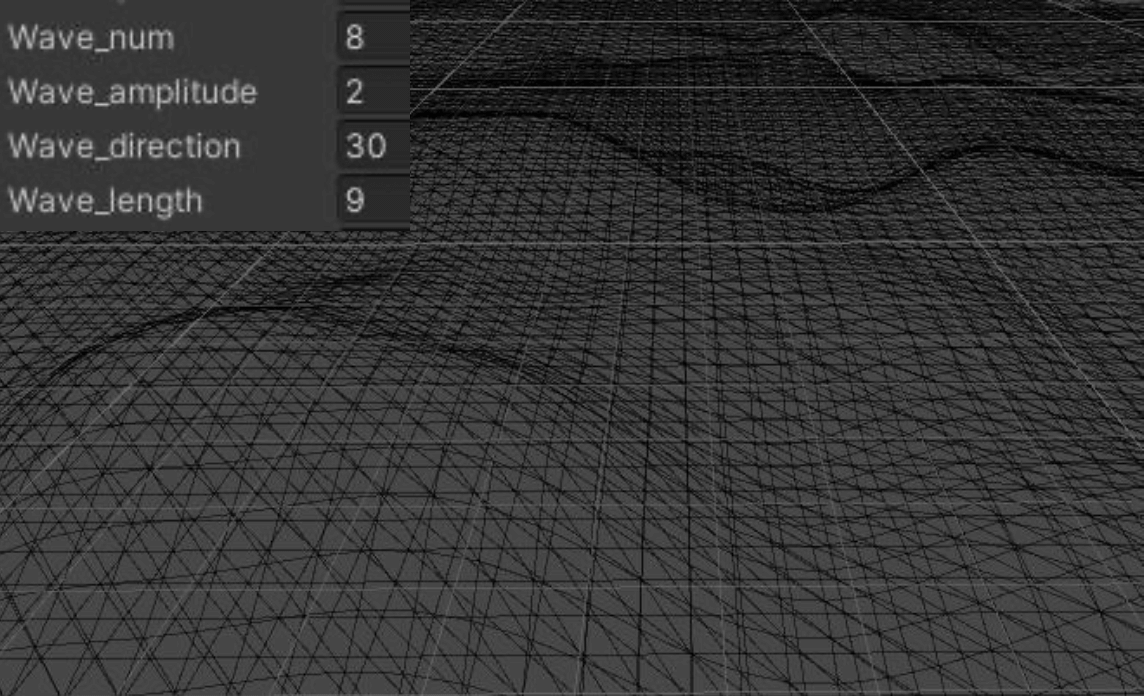
在Unity的Scene面板中的左上角,切换至网格渲染,该模型组如下所示,中间的网格顶点密集,边上的顶点稀疏。
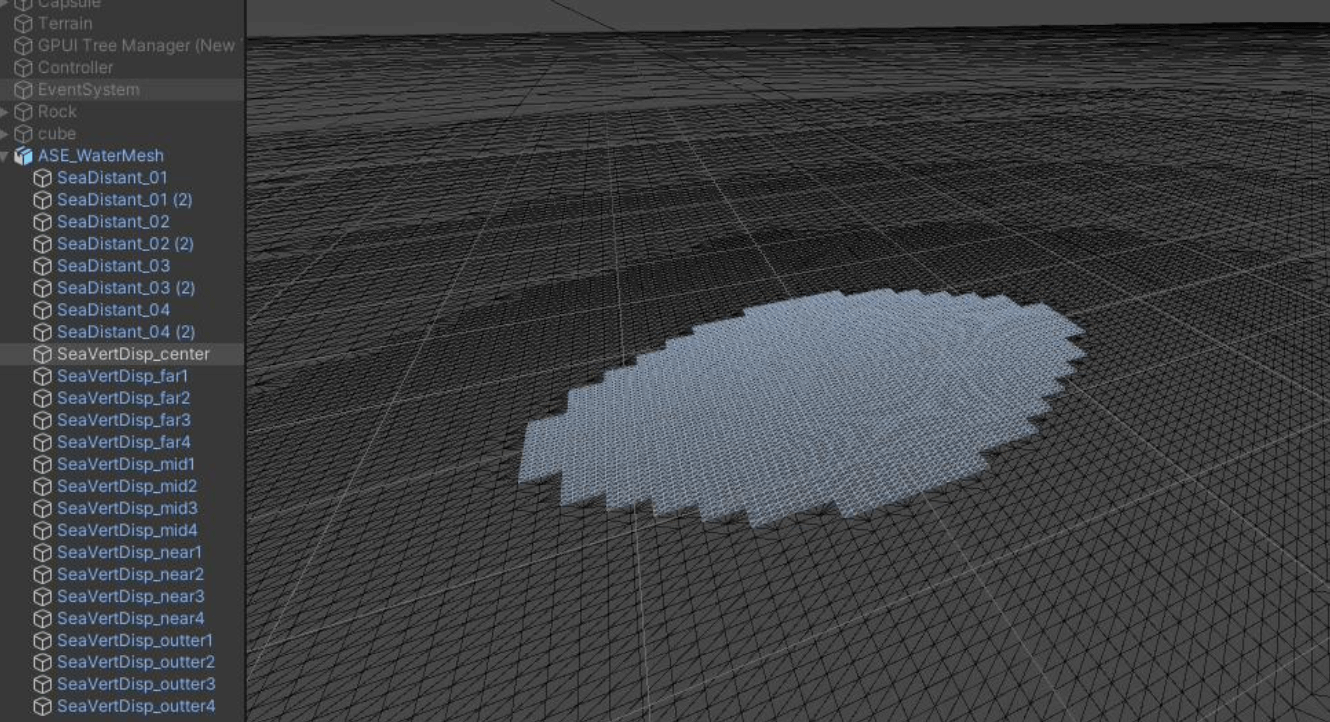
水面网格
将该模型组添加到ASE_Water的Water Mesh列表中。
然后我们需要在Update中实时更改其位置,使其始终保持在摄像机朝向的下方。
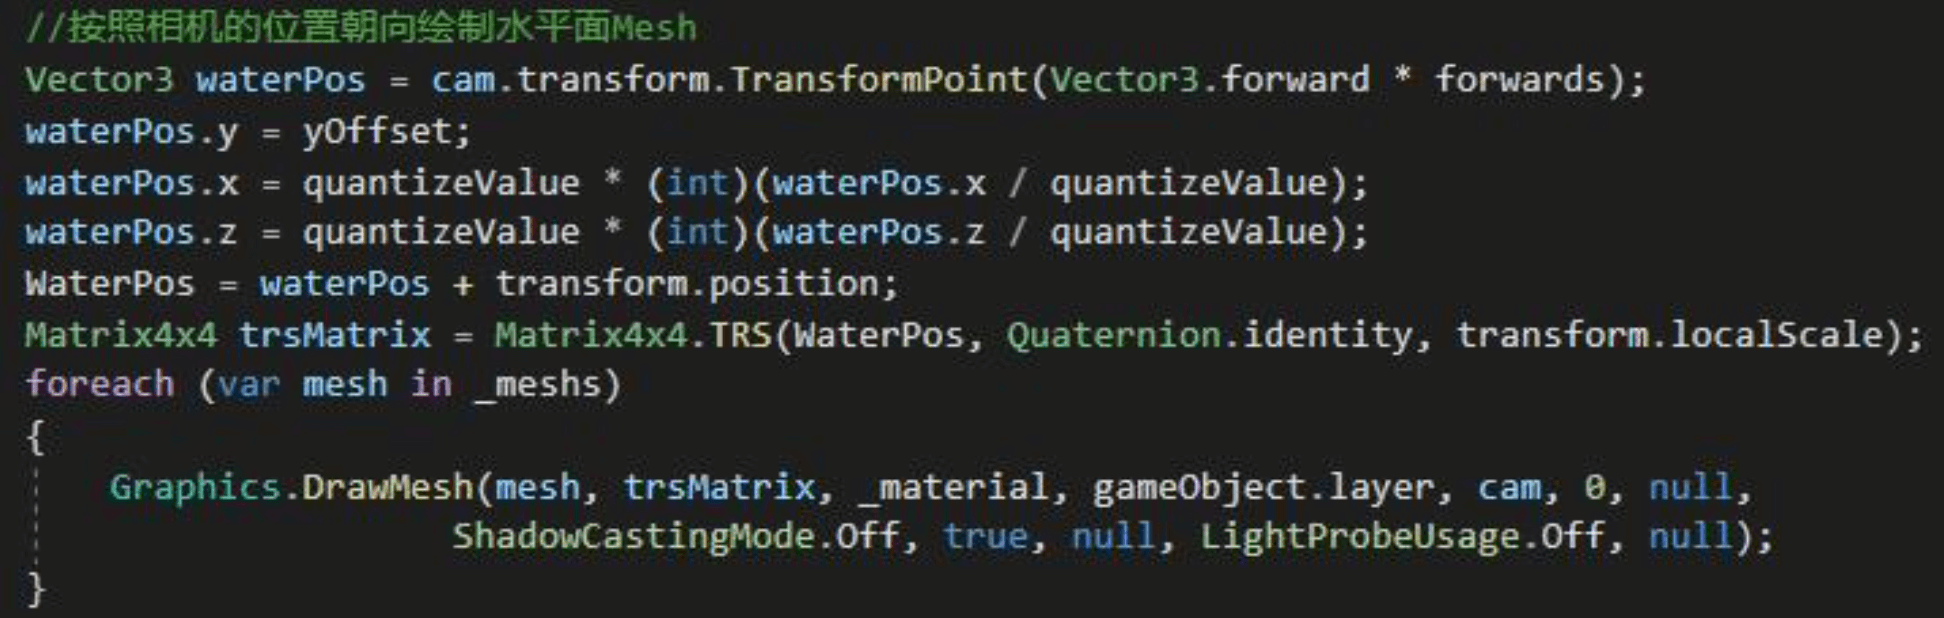
更改水面位置
现在就得到了一个可以跟随相机的水面了。
2. 顶点动画
现在的水面是一个平面上的网格,需要对顶点进行偏移才能模拟波浪。
代码部分在Assets\ASE\Shaders\ASE_Water.shader 实现。
2.1 单个Sin函数
顶点高度函数:
Wi(x,y,t) = Aisin(Di(x,y)wi+tΦi)
Wi:修改后的顶点位置。输入为x,y坐标(水面顶点的x,z)以及时间t,输出为变换后的z坐标(水面顶点的y)
Ai:控制水的振幅
Di:波浪移动的方向,与(x,y)点乘得到某一方向上的分量
wi:频率,和波长互为倒数,控制水的波长
Φi:与t相乘代表波峰的移动距离,控制水的移动速度
单个Sin函数生成波浪
法线函数:
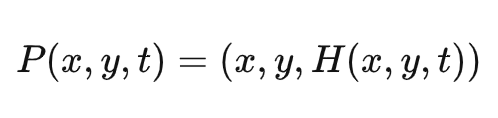
首先定义顶点坐标函数:
P(x,y,t) = (x,y,Wi(x,y,t)) ,其中Wi(x,y,t)即刚才的顶点高度。
一个顶点的法线怎么求得?
求出X和Y方向上的偏导B和T,再用B*T得到顶点的新法线N。
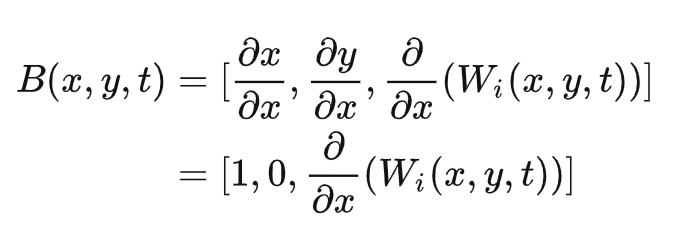
对X偏导,得到B:
同理,对Y偏导,得到T:

B*T得到N:

其中:

//单个Sin波浪
WaveStruct SinWave(half2 pos,float waveCountMulti, half amplitude, half angle, half wavelength)
{
    WaveStruct waveOut;
    float time = _Time.y;
    half w = 6.28318 / wavelength;
    half wSpeed = sqrt(9.8 * w);
    angle = radians(angle);
    half2 direction = half2(sin(angle), cos(angle));
    half dir = dot(direction, pos);
    half calc = dir * w + time * wSpeed; // the wave calculation
    half cosCalc = cos(calc);
    half sinCalc = sin(calc);
    waveOut.position = 0;
    waveOut.position.y = amplitude * sinCalc*waveCountMulti;
    waveOut.normal = normalize(float3(
                            -w*direction.x*amplitude*sinCalc,
                            1,
                            -w*direction.y*amplitude*sinCalc
                        )) * waveCountMulti;
    return waveOut;
}
2.2 叠加Sin函数
顶点高度函数:

法线函数:
此时得到新的顶点坐标函数:
同理求得法线N:

其中:

多个Sin叠加
2.3 Gerstner叠加波浪
Sin函数的变种,可以使得波谷更加平坦,波峰更陡峭,更好地模拟波浪。
Sin函数中的P(x,y,t)只会修改其z值,而Gerstner中还需要将x,y坐标向波峰位置移动。
新的顶点坐标函数:

其中,x,y分别向各自的偏导方向移动,即波峰位置。
同理,求偏导得到B和T,再用B*T得到顶点的新法线N。
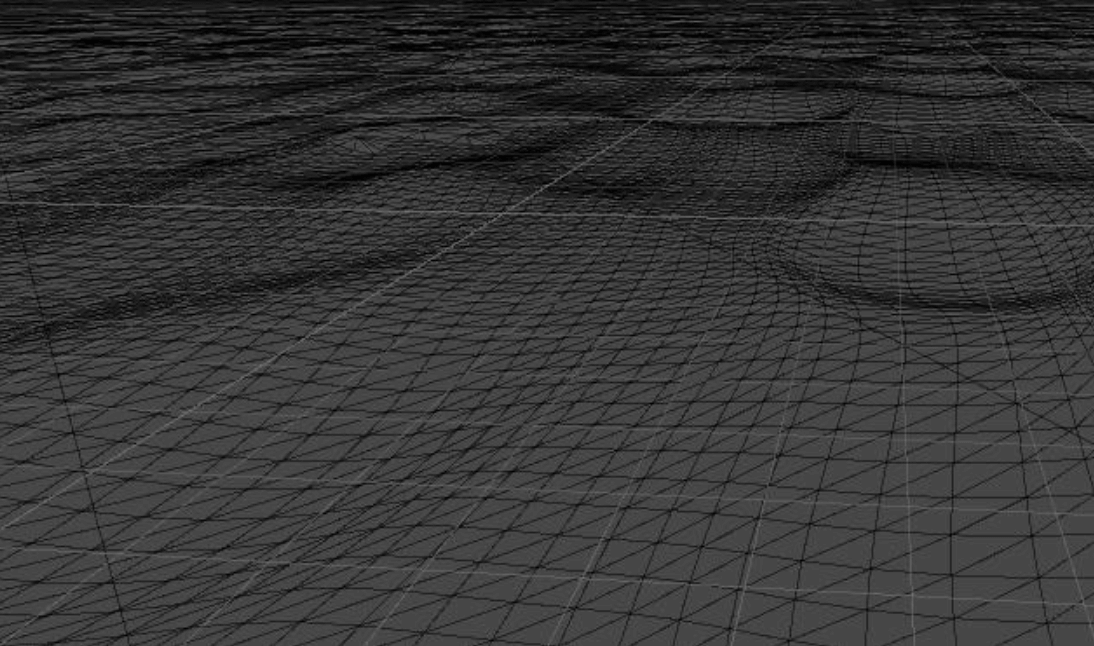
多个Gerstner函数叠加
到这里,波浪生成的部分就结束了。
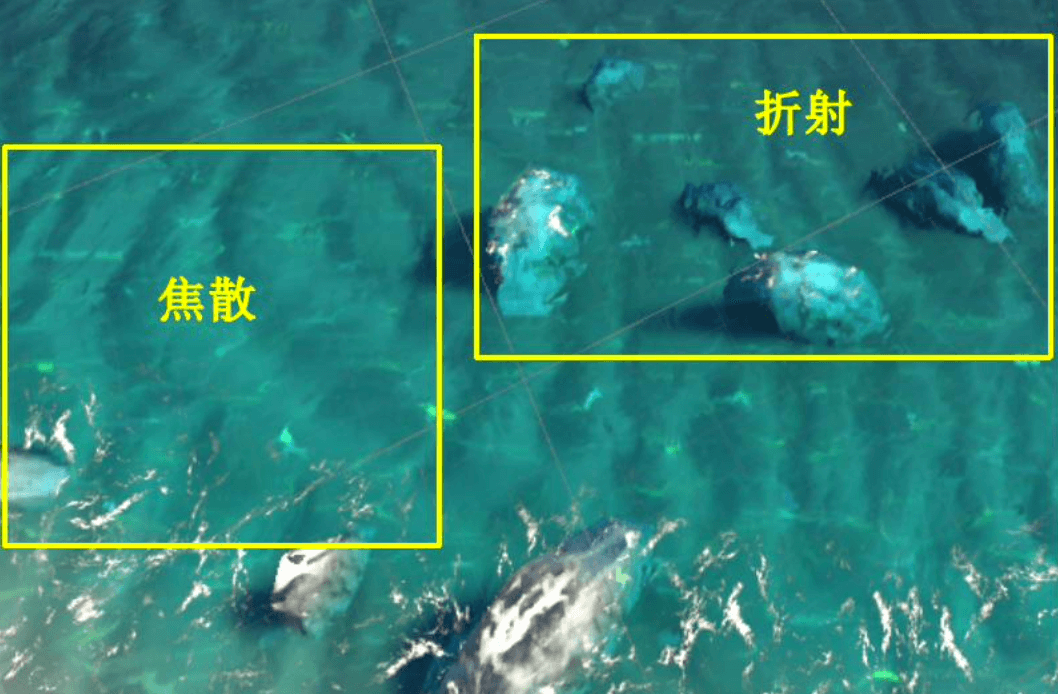
二、折射
1. _CameraDepthTexture
该纹理由渲染管线在渲染完不透明物体之后生成,在Renderer中勾选OpaqueTexture即可。
2. UV扰动
对_CameraDepthTexture采样,不过需要添加一定的UV扰动(扰动值是根据顶点法线算出来的)。
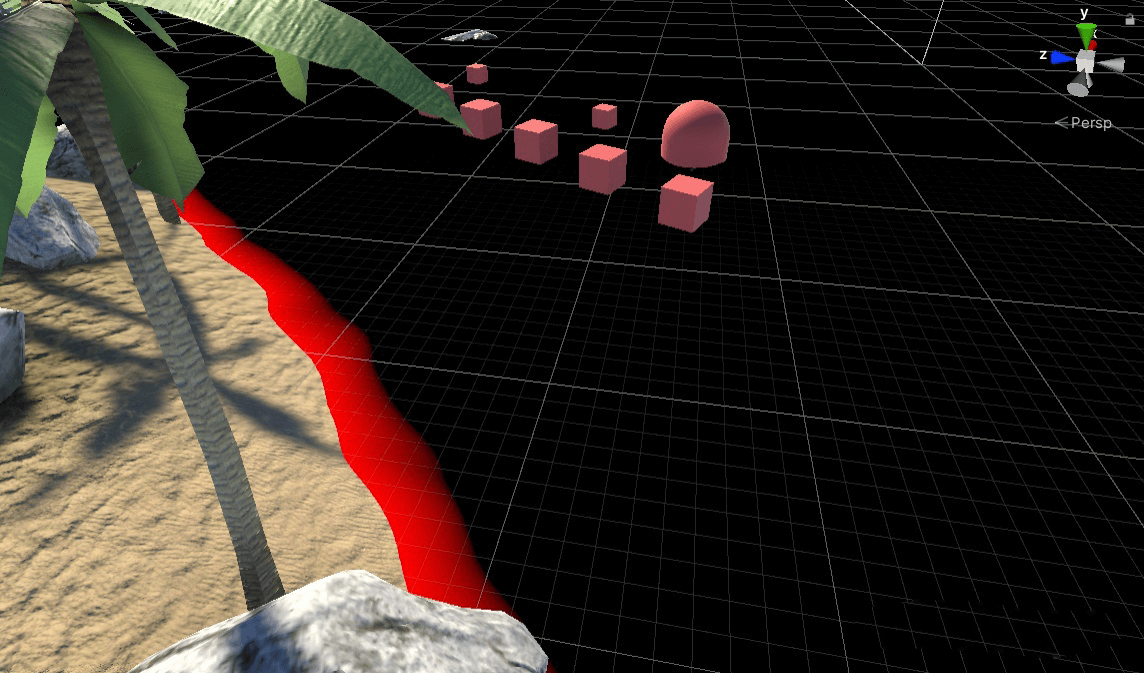
此时可以得到效果如下:

注意到黄色框内的错误,在水面上的物体也进行了UV扰动,这并不应该,需要对其修正。在第4小节:修正中讲解。
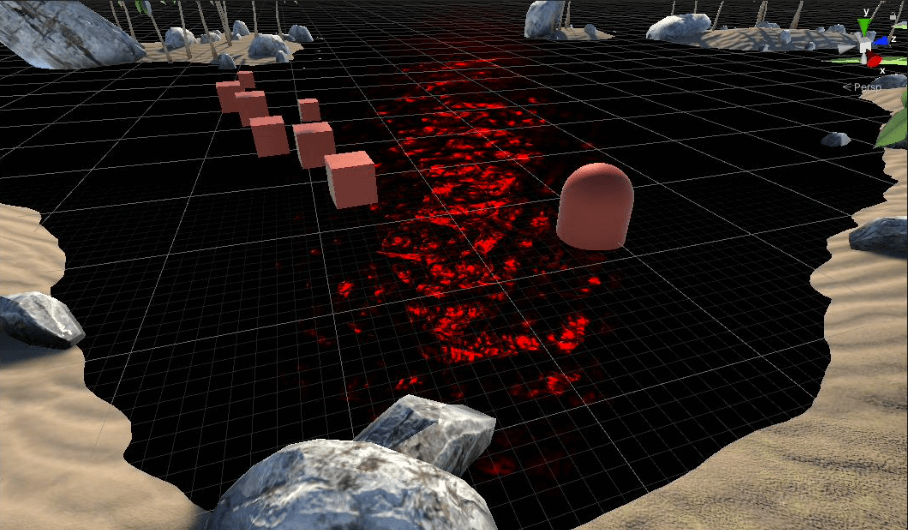
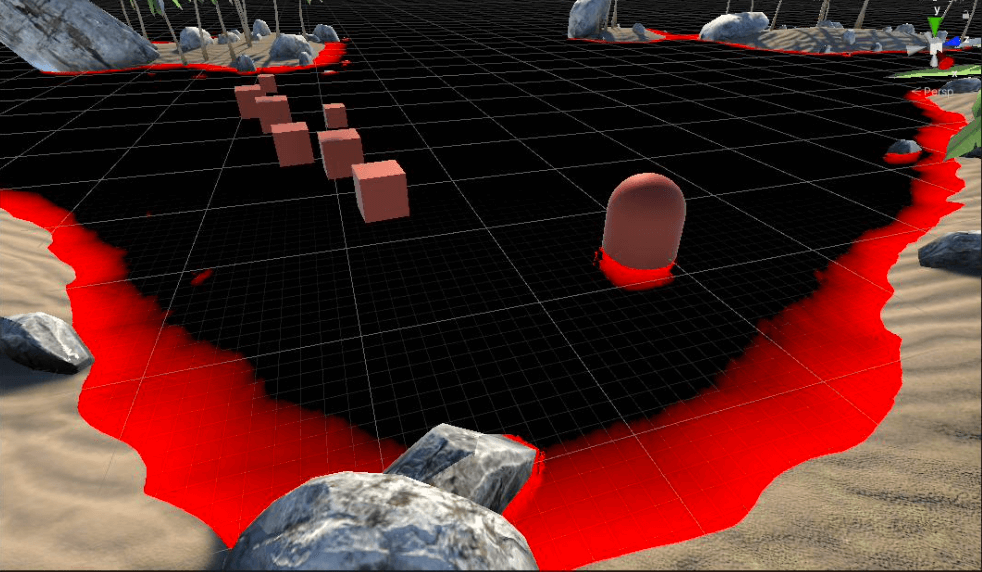
3. WaterDepth
在Shader中定义二维向量WaterDepth,其中x存储了视角方向上的水的深度,y存储了水的竖直深度。
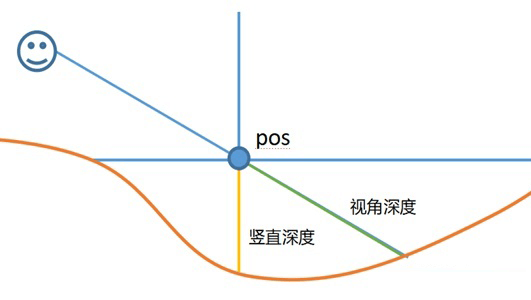
WaterDepth示意图
WaterDepth.x对_CameraDepthTexture采样,由采样得到的深度减去相机到水面顶点的距离。
WaterDepth.x
WaterDepth.y 添加一个垂直水平面的相机,生成深度纹理。
WaterDepth.y
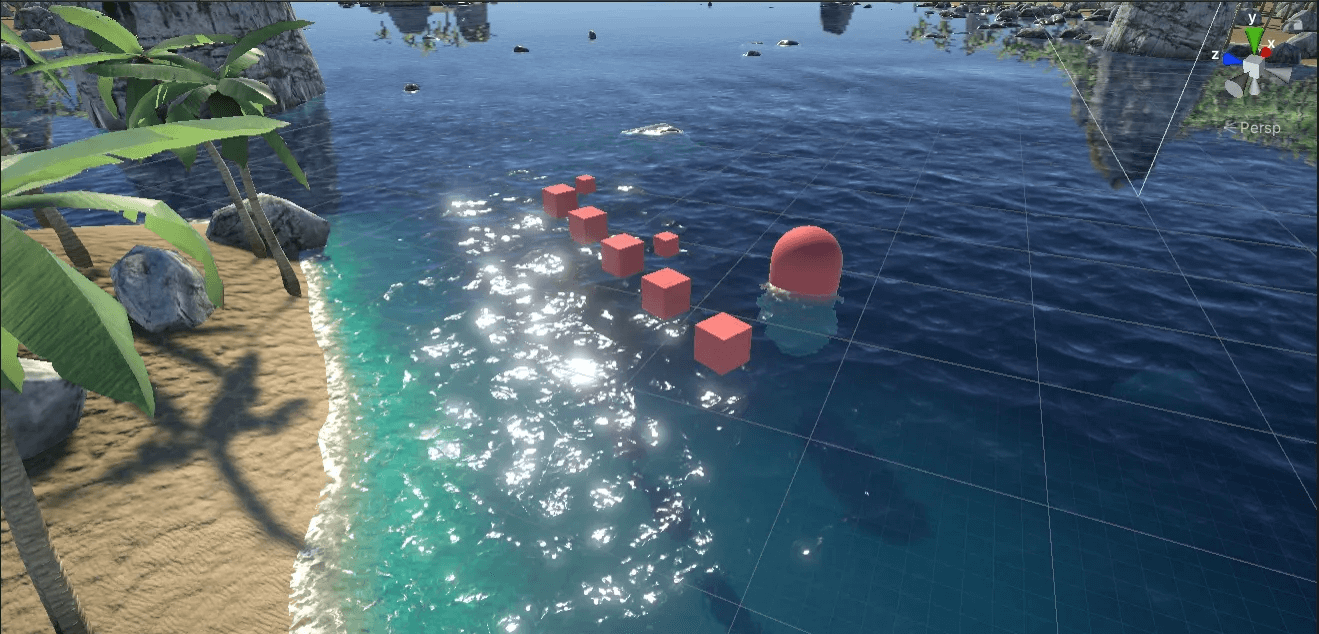
最明显的差别就在于视角深度会随着观察角度改变,上面视角深度中的胶囊体靠近水面部分为红色,就是因为在这个角度观察,会得到较小的视角深度。
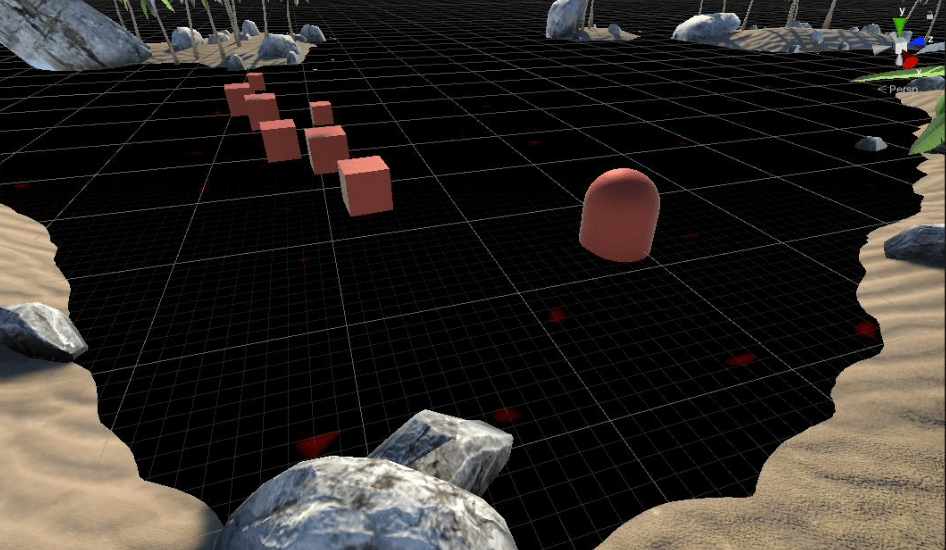
4. 修正
对_CameraDepthTexture进行UV扰动时,我们可以对WaterDepth.x进行同样的的扰动,得到如下效果:
WaterDepth.x(修正)
这时候,用扰动过后的WaterDepth.x判断该点是否在水平面以上。若是的话则取消扰动,直接用Screen UV进行采样。
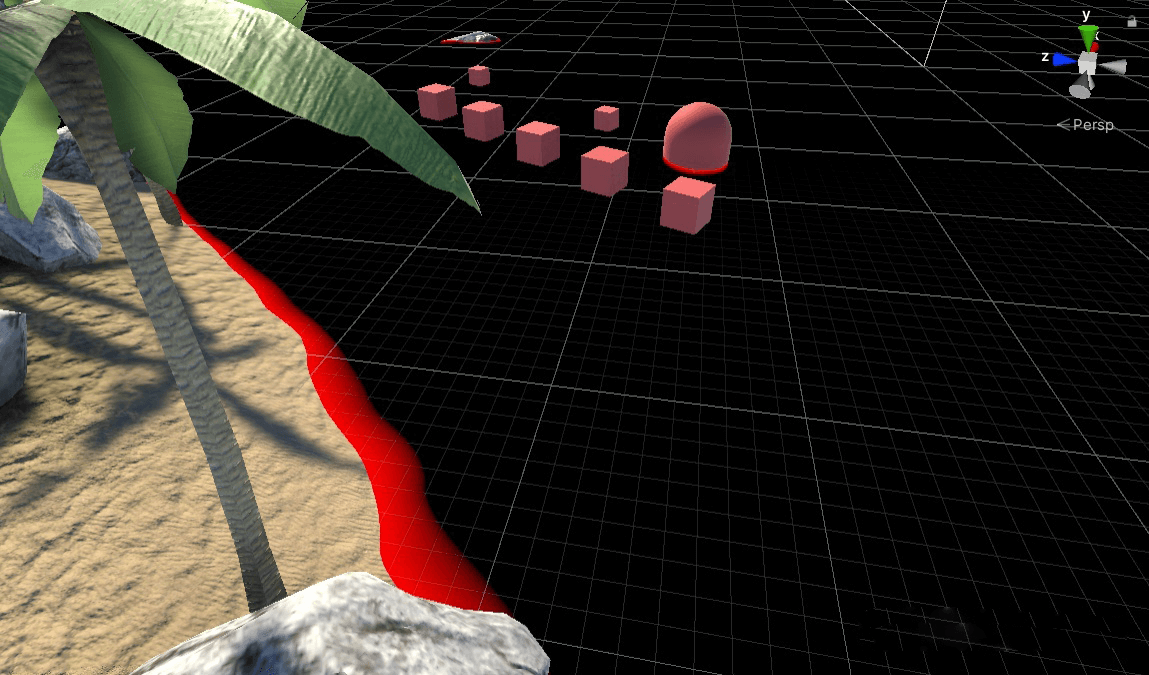
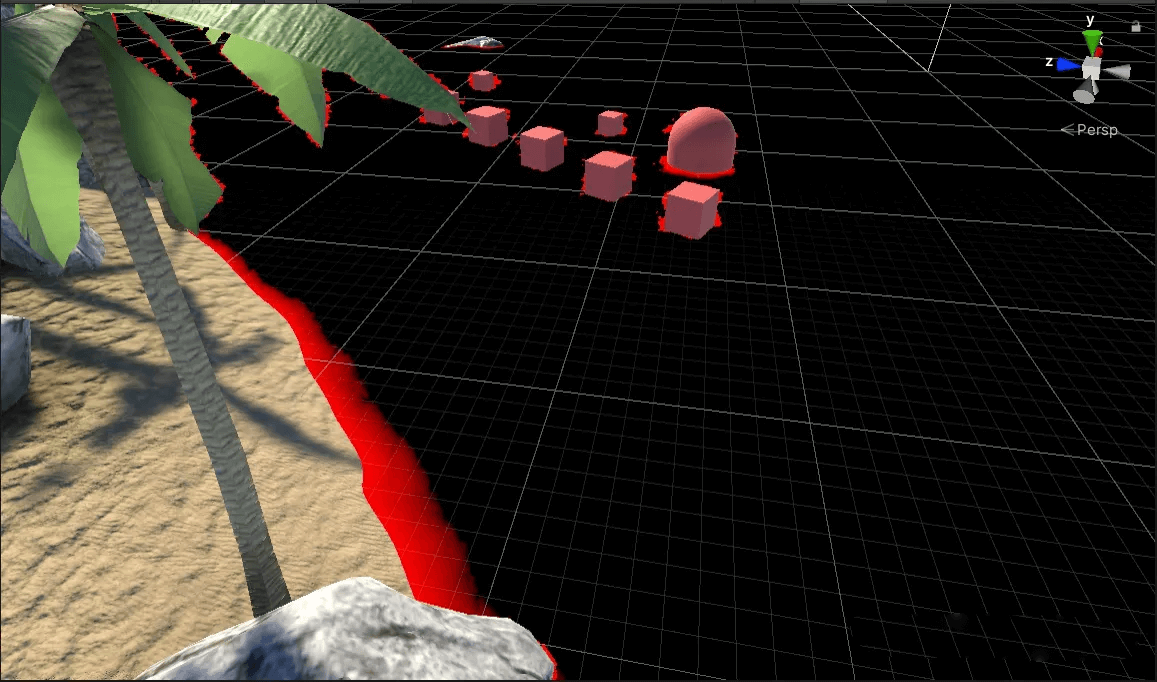
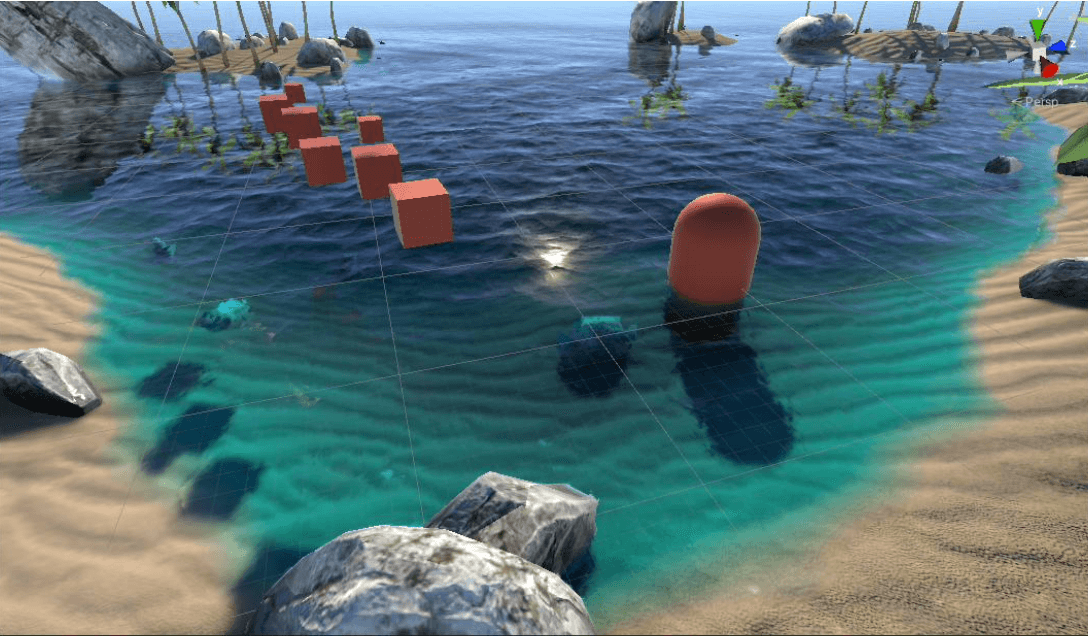
此时,就能得到一个较好的折射效果:
折射(修正)
可以看到,树叶以及在水面上方的方块、胶囊体都没有产生扰动了。
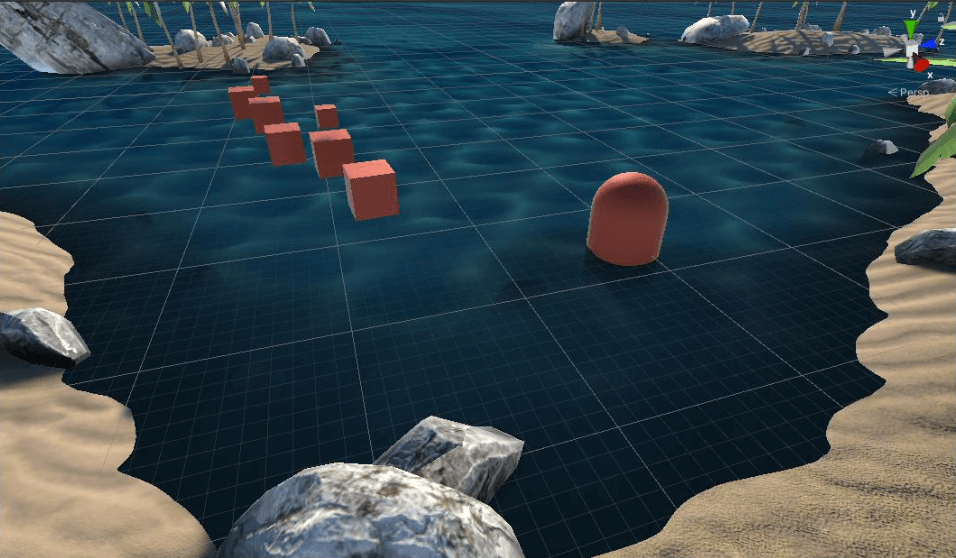
5. SSS吸收
同时,随着水的WaterDepth.x变得越大,我们能从水中观察到的折射部分会越少。在Demo里,自定义了一条吸收色带。当WaterDepth.x较小时,我们能够透过水面看到水下的物体,对应了色带左边的白色;当WaterDepth.x较大时,我们基本看不到水下的物体,随影了色带右边的黑色。

模拟水对光线吸收
模拟水对光线的吸收
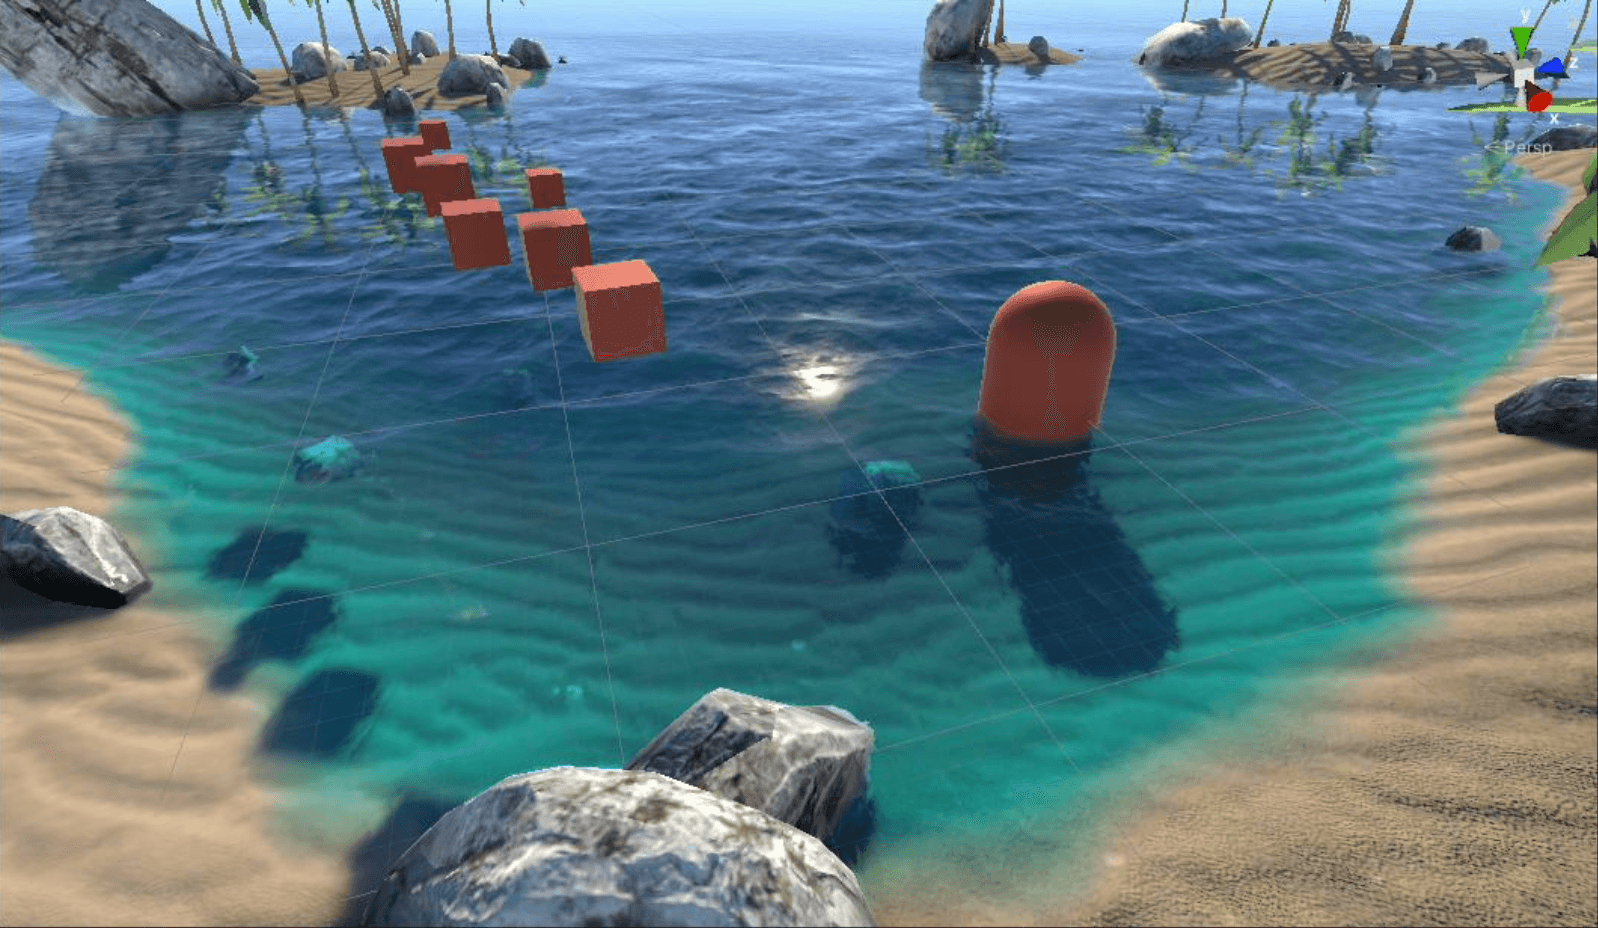
将上述水对光线的吸收与折射部分相乘,即可得到整个折射部分的效果:
折射+SSS(吸收)
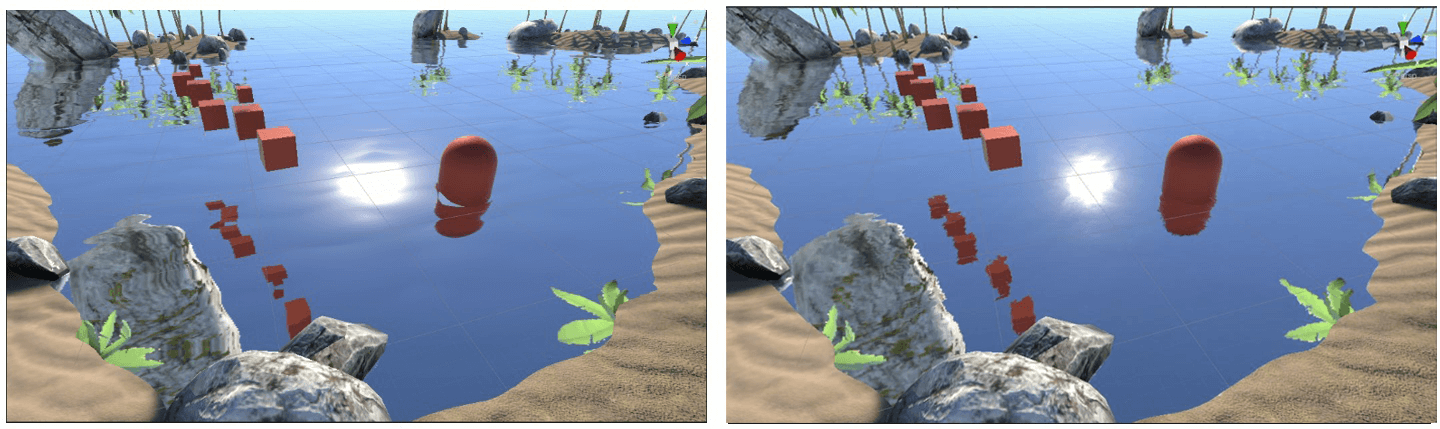
三、反射
1. 翻转摄像机
水面反射物体的倒影,是将摄像机关于水平面做了一次翻转(位置、朝向都关于水平面对称)。对应到摄像机就是把红框内两个属性取反。
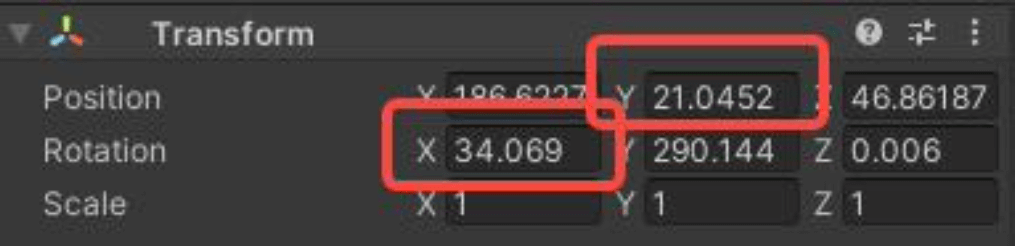
位置和朝向取反
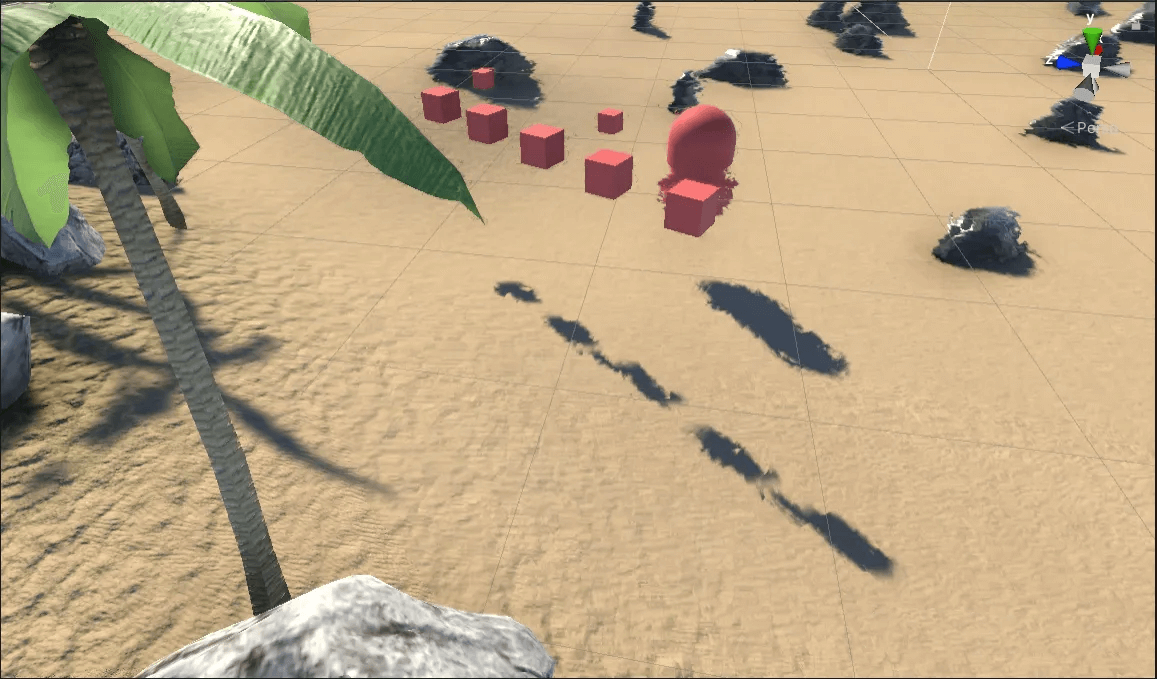
下面试一试,将摄像机翻转后的效果:
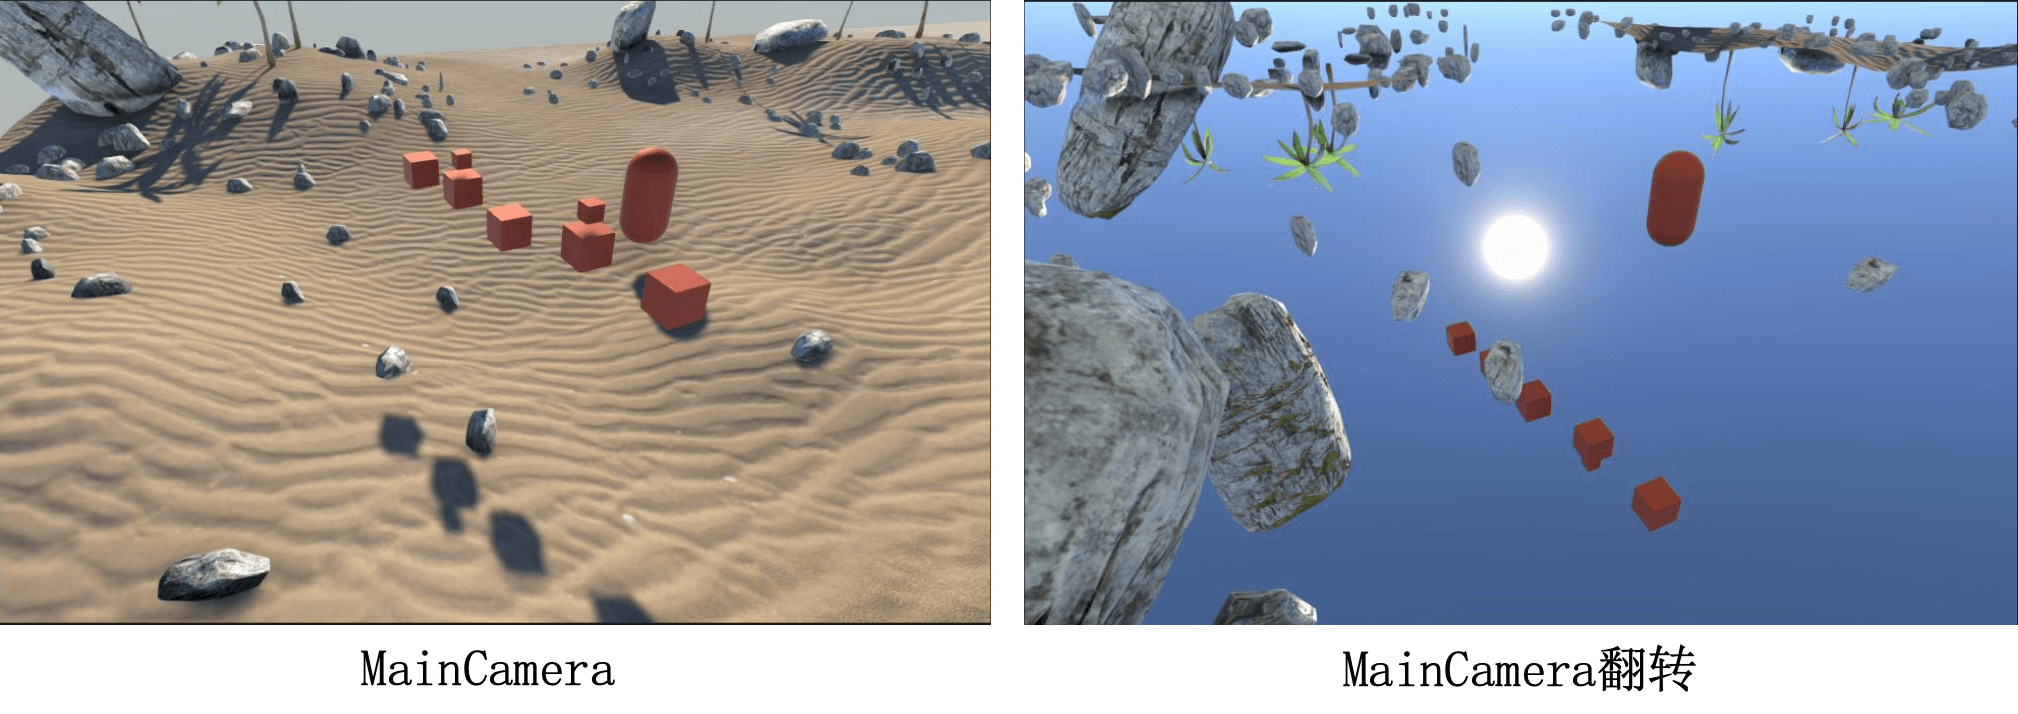
此时若直接将反射纹理采样到水平面上,会出现问题:
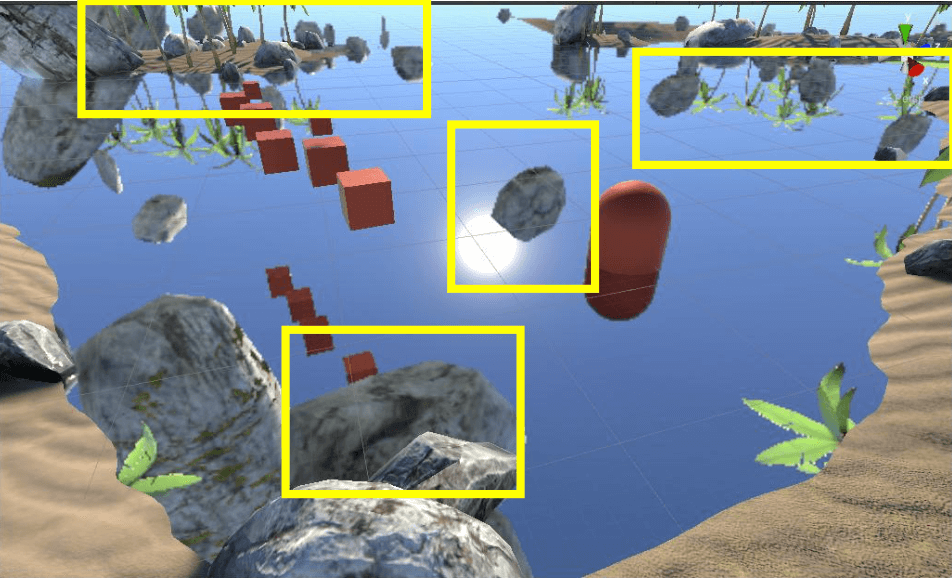
直接翻转摄像机
是因为我们把摄像机进行翻转后,水下的物体也能被看到,跟着一起反射了。
2. 斜面裁剪
所以我们需要对其进行一次斜面裁剪,将水面以下的物体给裁剪掉:
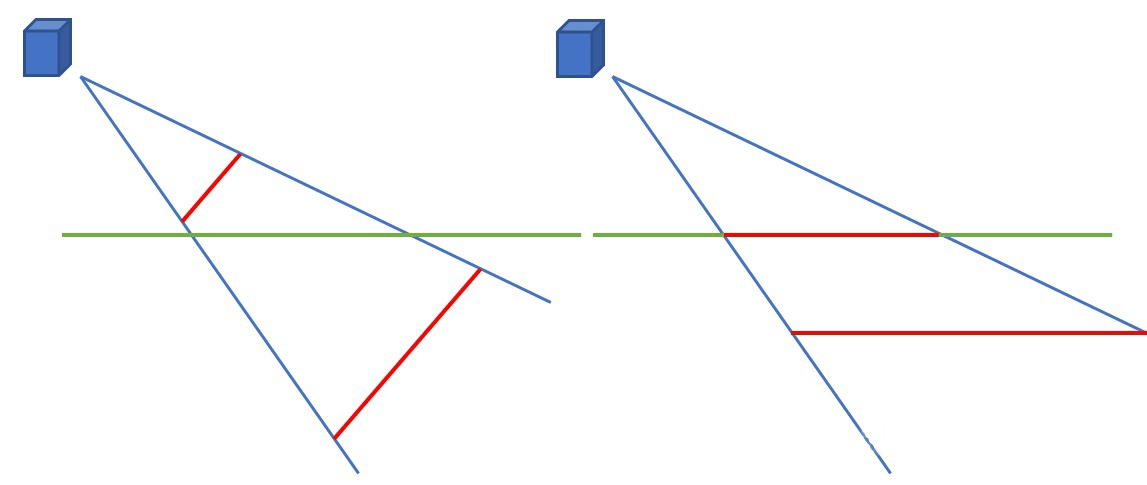
左边为常规的裁剪面,右边为斜面裁剪
Unity里可以很方便地实现斜面裁剪,调用CameraSpacePlane(),设置好裁剪面即可。

设置裁剪面
现在看看斜面裁剪之后的水面:
反射(斜面裁剪)
3. UV扰动
同样根据顶点法线添加扰动,不过在Demo里还有一张水的表面贴图:

表面贴图
可以通过该贴图使得法线扰动更加细节,后续的焦散效果也用到了该贴图。
左图根据顶点法线进行扰动,右图结合了顶点法线和表面贴图
四、菲涅尔项
当观察者和反射平面的夹角不同时,其反射和折射所占比例各不相同,菲涅尔效应即描述该现象。
通过ViewDir(相机位置 - 水面顶点)和水面顶点法线相乘,可以得到夹角大小,然后进行幂运算可得到更好的效果。

菲涅尔项
可以看到,近处较暗,容易看到折射部分;远处较亮,容易看到反射部分。
将折射和反射按照菲涅尔项进行混合:
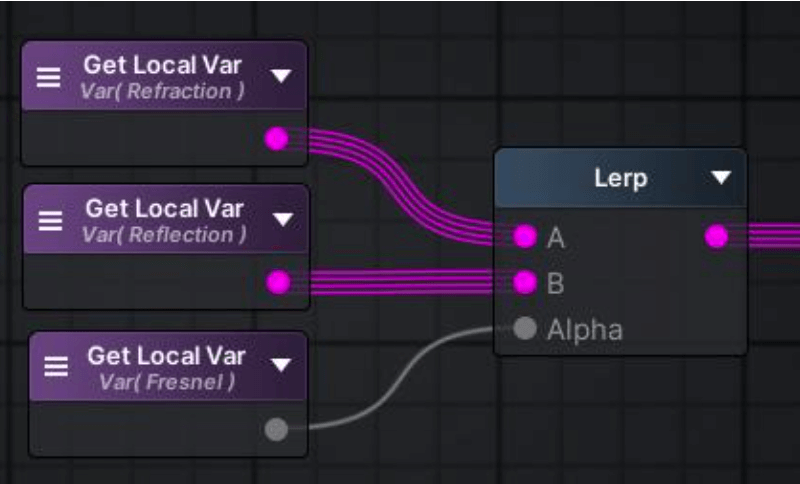
折射与反射混合
按菲涅尔项混合折射与反射
五、SSS散射
在折射部分,已经模拟了水对光的吸收,现在还需要模拟水对光线的散射(更好模拟出水体通透的效果)。散射部分的色带与吸收相反:

水对光线的散射,主要是模拟直接光照和环境光,当WaterDepth越大时,会有更多的光散射出来,而不是被吸收(吸收的部分是要从水下折射出来的光,散射是水上反射的光)。

模拟水对光线的散射
然后乘上环境光(环境光用的Unity提供的球谐采样)和直接光照:
SSS散射
现在将SSS散射和之前的效果叠加:
折射+反射+菲涅尔+SSS
六、高光反射
设置好水面的BRDF,然后将顶点法线,ViewDir和LightDir作为输入,即可得到高光反射部分:
高光反射
将其叠加到之前的效果上:

折射+反射+菲涅尔+SSS+高光
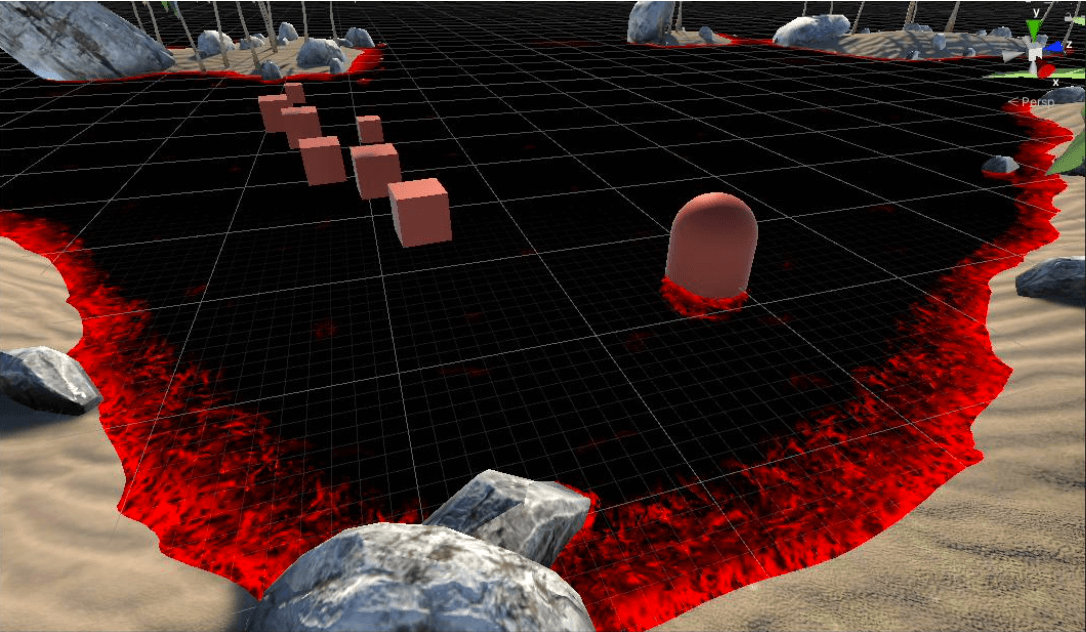
七、浮沫
1. 深度采样
靠近岸边以及靠近物体的地方都需要产生浮沫,所以需要结合WaterDepth的x和y分量。靠近岸边的的WaterDepth.y一般比较小,靠近中间悬浮物的WaterDepth.x一般比较小。两者取反之后,再取最大值,即可得到下图所示的浮沫产生区域。
浮沫区域
还有在波峰的位置也可以添加一点浮沫,采用了frac(sin(x))用以产生随机数,使得波峰位置产生的浮沫具有一定随机性(其实好像没有用)。
波峰浮沫区域
将浮沫纹理采样,结合浮沫产生的区域,即可得到下图所示的浮沫遮罩:
浮沫遮罩
2. 计算光照
Demo里的浮沫本身没有颜色,需要通过浮沫遮罩计算光照得到:

不同光照对应了不同颜色的浮沫
通过浮沫遮罩将水面和浮沫进行混合:
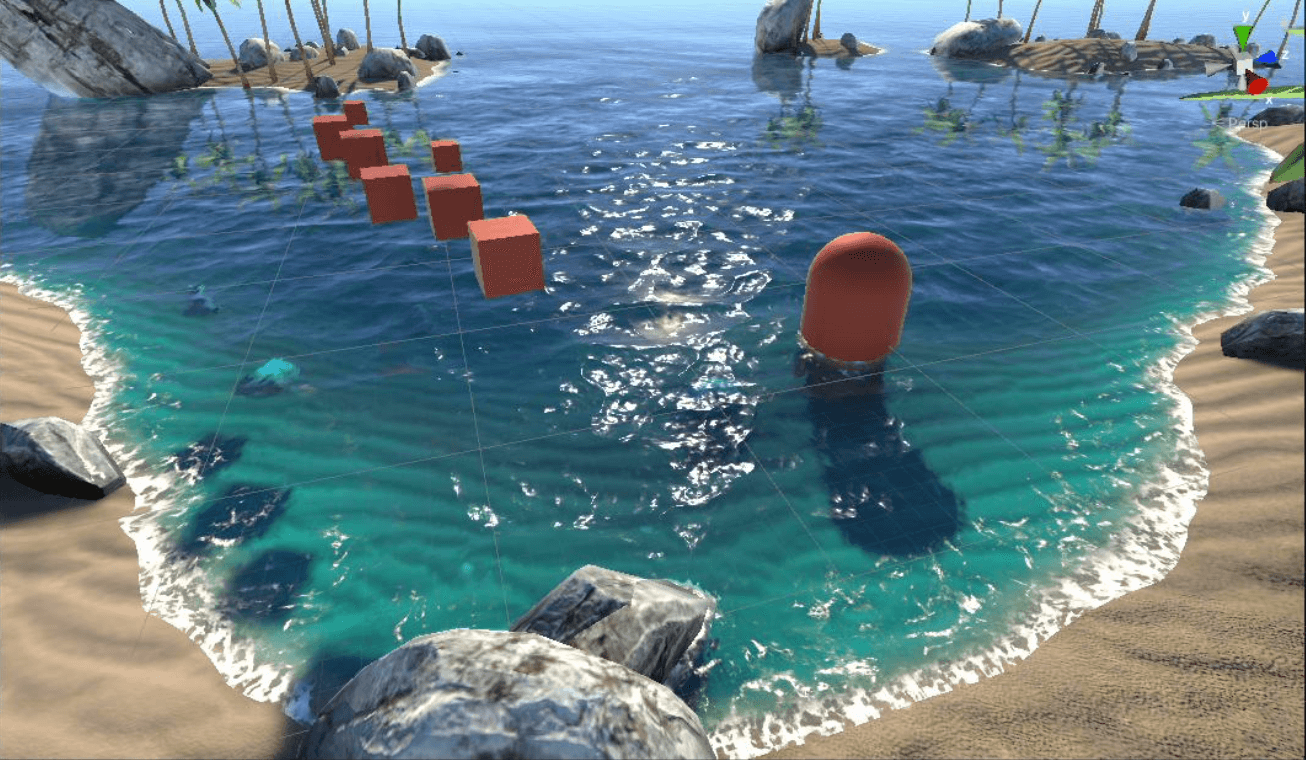
折射+反射+菲涅尔+SSS+高光+浮沫
最后可以加上一些后处理效果,调整场景中Post-process Volume的Volume组件即可。Bloom:
Bloom后处理
参考链接:
lionheart:BoatAttack_水效果分析2_水的细节作色效果(折射,SSS,高光)
https://github.com/Unity-Techno
这是侑虎科技第1272篇文章,感谢作者Shawoxo供稿。欢迎转发分享,未经作者授权请勿转载。如果您有任何独到的见解或者发现也欢迎联系我们,一起探讨。(QQ群:465082844)
作者主页:https://www.zhihu.com/people/xiao-sen-zhong
再次感谢Shawoxo的分享,如果您有任何独到的见解或者发现也欢迎联系我们,一起探讨。(QQ群:465082844)